Pool Water Testing Is Essential to Pool Health
We simply can’t stress enough how important it is to regularly test your pool water early and often. After all, a personal home swimming pool is a major investment, so why not take all of the necessary precautions to ensure the long term health of your pool?
How to Test Pool Water Accurately
- Get a clean container for the sample (depending on the type of testing equipment you are using, this may be provided).
- Flip the container upside down, with the mouth of the container open toward the ground.
- Find an area of your pool away from return jets or the pool skimmer—preferably in the dead center of your pool.
- Submerge the container into the water until the water comes up to your elbow.
- Flip the container right-side-up, which will let the water into the container, collecting the sample.
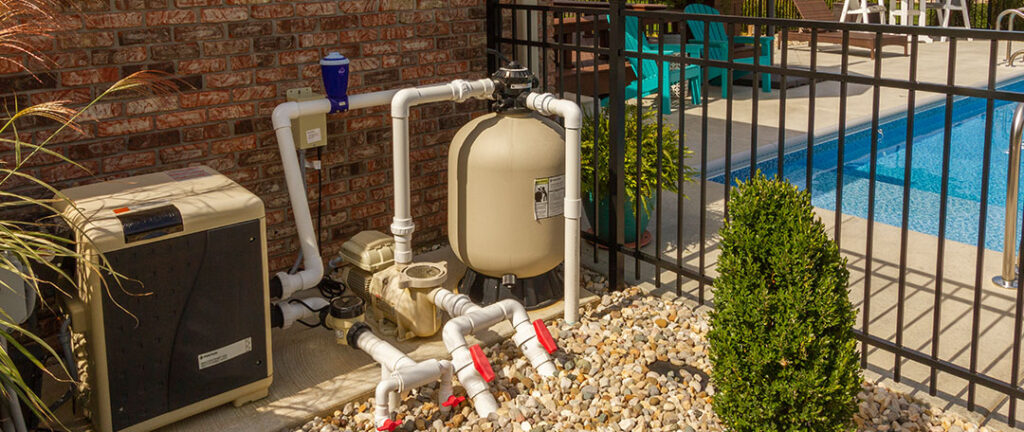
Filters Keep Things Clean
The job of the filtration system is to remove any undissolved dirt and debris from the pool water. There are three types of swimming pool filters:
Sand Filters – Inexpensive and easy to operate, sand filters remove dirt and debris through a process called “backwashing,” which basically means flipping a switch to reverse the water flow. All you have to do is check the filter’s pressure gauge. If the gauge indicates a 7- to 10-pound increase over normal operating pressure, it’s time to backwash.
A few things to keep in mind if you’re considering a sand filter:
- Sand filters are more efficient when they are slightly dirty, which means you shouldn’t backwash more than necessary.
- Sand filters should be cleaned at least every season with a filter cleaner.
- You should completely replace your filter sand every five years or so.
Cartridge Filters – Although a cartridge filter costs a bit more upfront than a sand filter, many swimming pool owners feel that it’s worth the extra money. Cartridge filters remove more dirt and debris than sand filters, and they don’t require backwashing. Instead, you simply remove the cartridge when it becomes too dirty and hose it off.
Here are a few tips to get the most out of your cartridge filter:
- At the minimum, you should expect to do a deep cleaning twice a year. Depending on pool size and usage, you might want to do it more often. Check with your local pool professional.
- To avoid 12 hours of filtration “downtime,” consider buying a second cartridge so you’ll have a spare when it’s time for cleaning.
Diatomaceous Earth (DE) Filters – DE filters are similar to sand filters and operate in much the same way. Like a sand filter, a DE filter requires backwashing when the pressure gauge rises. However, unlike sand filters, DE filters only need to be backwashed a few times a year. What’s more, DE filters are also the most expensive of the three – but they also offer the best filtration capabilities, superior to both sand and cartridge filters.
Additional care and maintenance considerations include:
- To remove build-up, you should deep-clean your DE filter grids at least once every season using filter cleaner.
- Once a year, you should disassemble your DE filter for a deep cleaning and inspection to look for damage such as tears or rips in the grids.
How to Make Your Pool Crystal Clear Again
Keep Up with pH and Chlorine Levels
Do you have a water testing device in your supply kit? If not, you might want to add it to your arsenal as soon as possible. Keeping up with the chemicals in your pool is the first step to maintaining crystal clear water.
Test the water a couple times a week and take note of what you find. Ideally, the chlorine levels should be at 1 to 3 parts per million and the pH levels at 7.2 to 7.6. Maintaining these levels helps to avoid cloudiness and bacteria growth.
Run That Filter
It’s recommended that you run your filter for 8 to 10 hours a day when using your pool. Doing so keeps the water fresh and healthy. Without regular filter use, the water will grow stagnant, and bacteria will flourish. That means you’ll spend a lot more time scrubbing and cleaning than swimming and laying out.
Skim, Skim, Skim
Yes, something that simple can be the trick to clear water. Skimming the top of your pool only takes a few minutes but is totally worth it.
What makes skimming so effective? When you skim the water, you remove all that organic material lying around. Leaving that material in the water allows it to break down and cloud the water. Do this once a day for best results.
Shock the Pool Once a Week
As you keep up with chlorine and pH levels, don’t forget to shock your pool once a week during the summer. This treatment kills any bacteria or algae that are hanging around. If you’ve noticed a lot of algae growth, follow up with algaecide
Easy Steps in Pool Water Testing without Kit
You may not know it, but your chemistry teacher has taught you an important skill for any pool owner: how to test pool water without a kit. Remember those experiments on acids and bases? Who knew that would come in handy when you run out of test kits, huh? The following method works whether you have an in-ground or above-ground swimming pool. That said, let’s get started.
1. Gather Your Materials
Pool test kits are composed of indicators or chemicals that indicate an imbalance in your water. So the objective here now is to create your indicator (a.k.a. “red cabbage juice indicator”) using the following items so that you can do pool water testing without a kit.
- Red cabbage
- Clear glass bowl and glasses
- Pot or kettle
- Kitchen knife
- Distilled water
- Wooden spoon or ladle
- Strainer
2. Prepare the Red Cabbage Juice Indicator
First, you’ll need to cut up or slice the red cabbage into small strips or pieces. After that, put the sliced cabbage into a clear glass bowl and put it aside.
In a pot or kettle, boil about two cups of distilled water. Once it boils, pour the water into the glass bowl with the cabbage until the cabbage is submerged.
Stir the solution with a wooden spoon or ladle occasionally then set it aside. After about 30 minutes, get at strainer and separate the liquid from the red cabbage. You will see that the water has now turned into a purplish red color.
3. Test Your Pool Water
Get a small amount of water from the pool using a clear container. Then, get your red cabbage juice indicator and put a few drops into the water to be tested. At this point, you will either see the color change or not.
Based on basic pool chemistry, if it changes into a red or pink color, it means that your pool water is acidic. On the other hand, if it changes into a greenish-yellow or bluish-green color then that means your pool water is too basic or alkaline. If there is no color change, then the water is balanced or neutral.
To make things easier, you can use a color chart that came with your old pool test kit. Simply match the color of the water to the color chart and you should be able to determine the pH levels of your pool water right away.

When to Test Your Pool Water
Determining how often to test your pool water can be a bit of a challenge. This is because the various chemicals you need to test for need to be tested at different rates. For the two most important readings, pH and chlorine levels, you should test weekly. However, most experts suggest testing for these readings two to three times per week.
We will discuss the frequency required to test some of the other chemicals in greater detail later in this guide. For now, just know that you should be testing the pH and chlorine levels of your pool’s water at least once a week.
Of course, beyond this regular testing, you should also test your pool water more often when it is being used more often. Also, if it has rained recently, and the pool wasn’t covered, it’s a good idea to test again before getting in the pool.
Important: You should always test your pool’s water both before and after adding any new chemicals. This is to ensure your safety and proper chemical balancing of your pool water.