The Country Kitchen Sink

Secrets of People Who Always Have a Clean Kitchen

You know the type—their floors are always gleaming and they’re never embarrassed to show you the inside of their microwave. The good news is, you can have a clean kitchen, too!

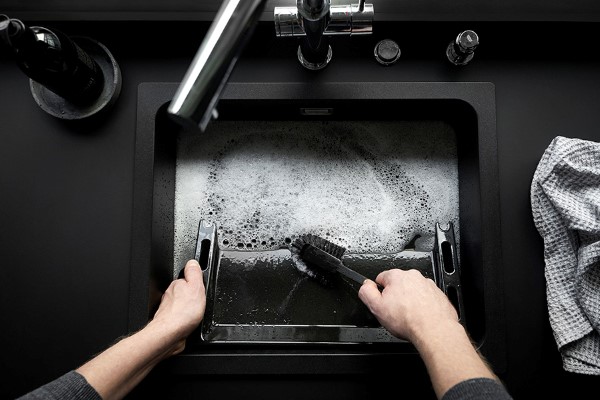
They Clean as They Cook

Let’s face it, cooking a meal makes a mess in the kitchen—but that doesn’t mean people with clean kitchens never eat! The difference is, they clean as they cook. Set out a large empty bowl to throw in egg shells, vegetable peels and wrappers so that all the garbage is contained to one spot. Place a dish bin next to the sink full of hot soapy water, and you can throw in dirty dishes as needed.

They Have a Place for Everything

If you have a specific spot for each item in your kitchen, cleaning up—and keeping it clean—is a lot easier. The key is only keeping things you use, and to stay organized. Use drawer and cabinet organizers, fridge bins and pantry baskets, so that every item has a home

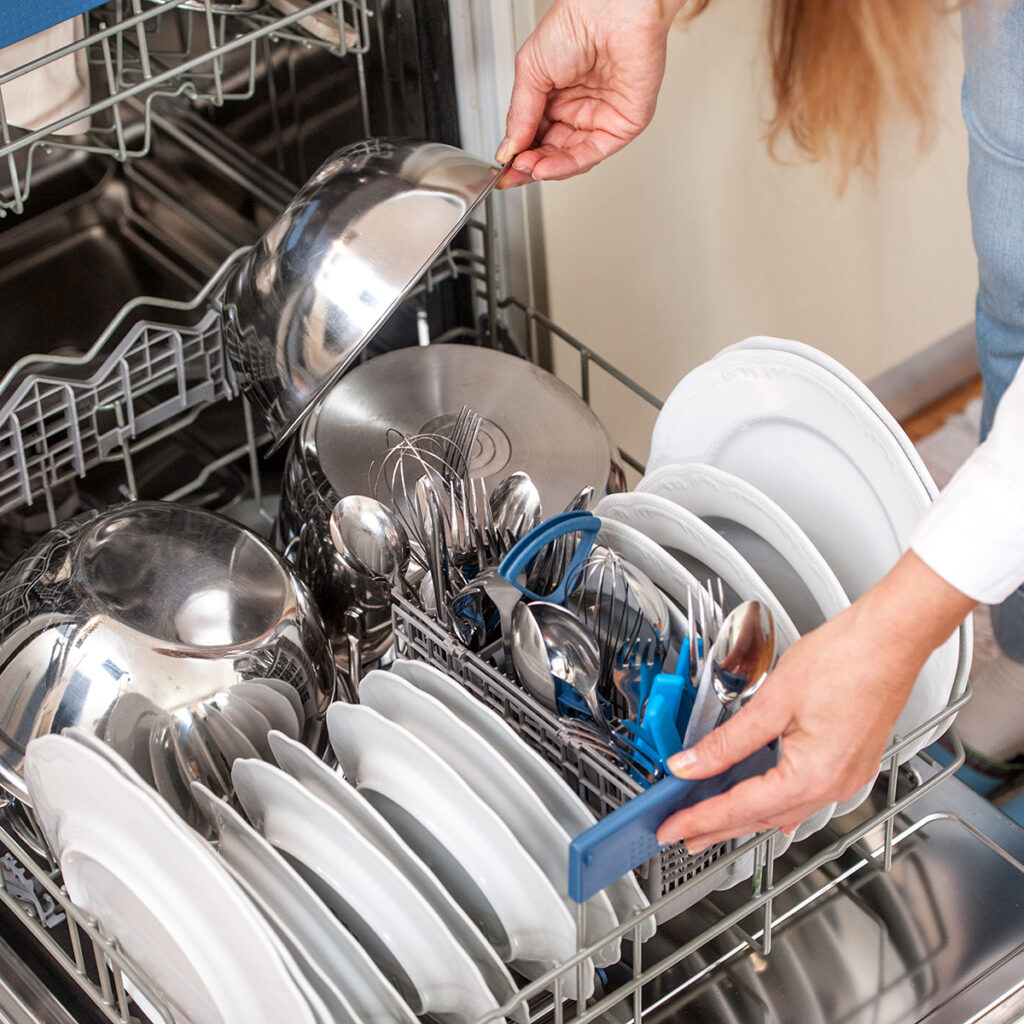
They Load the Dishwasher Every Night

Starting the day with an empty dishwasher sets you up for success. People with clean kitchens make a habit of loading and running the dishwasher before they go to bed, then emptying it first thing in the morning.

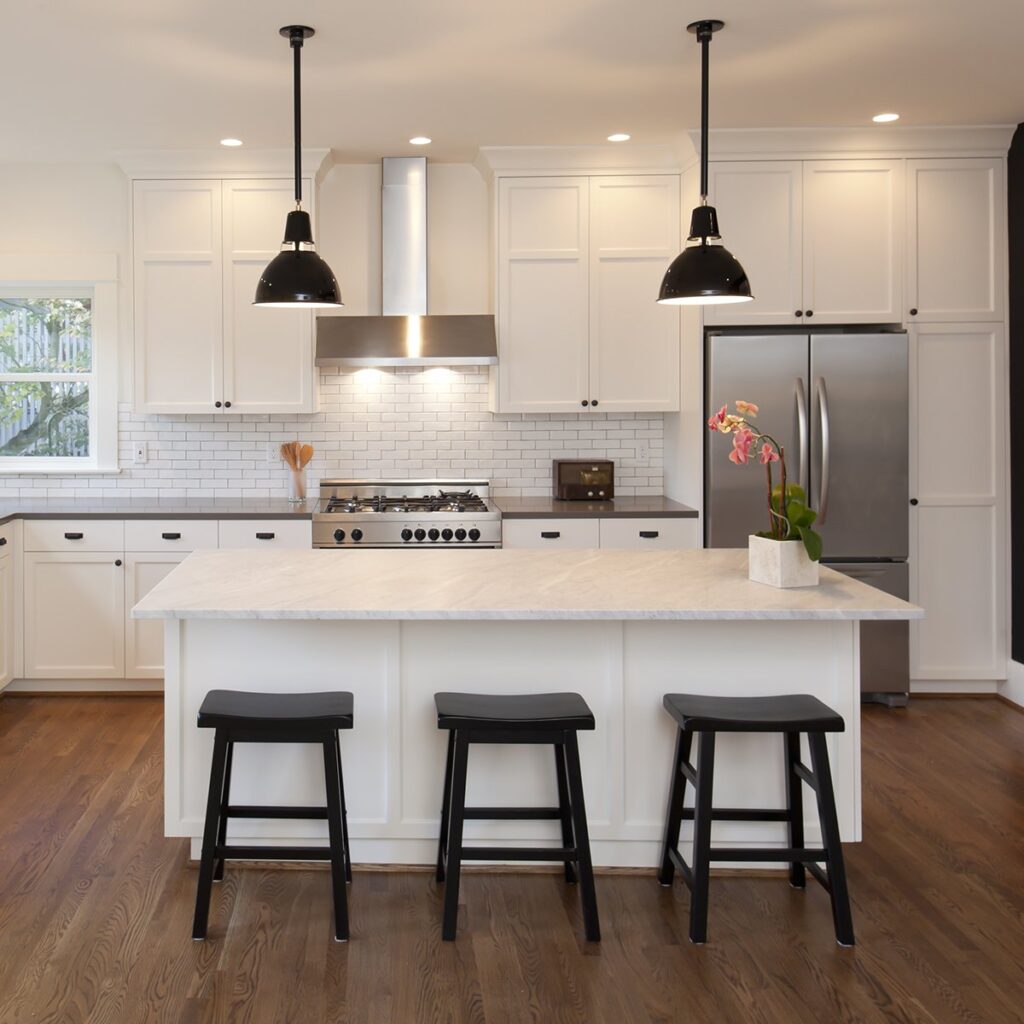
They Keep Counters Clear

If your kitchen counter is crowded with small appliances and decorative items, it’s easy for the area to collect dust, food messes and additional clutter. Instead, clear the counter of almost everything. Move mail and kids’ homework other zones in the house, and (if you have the cabinet space) put away appliances that aren’t used every day.

HOW TO ORGANIZE UNDER THE KITCHEN SINK

Want a quick project that will help get your kitchen organized in a hurry? Organize under the kitchen sink. Every once in a while I do a full clean out of this space and every time I do, I streamline it a little more, realize we need less, and maximize this area in the kitchen.

I don’t know about you but I open this cupboard daily and seeing it neat and tidy brings an odd sense of satisfaction. When it’s messy and cluttered it brings the opposite feeling – frustration. Want to tackle the space under your kitchen sink?

HERE’S THE SIMPLE STEP-BY-STEP:

Empty the cupboard.

Put the items in 4 categories: Keep, toss/recycle, donate, relocate.

Wipe down the cupboard – consider adding adhesive paper (like Con-tact paper) to the bottom shelf to protect it and make it a little more decorative.

Put what’s left into categories and set up containers to keep things in. I use a handled bucket, an upcycled vase for cleaning brushes, a small dish for veggie brushes, and a turntable for kitchen cleaning supplies and cleaners. Use what you have!

Once I use them for a day, I wring them out and rinse and place over the sink to air dry overnight. Then I put that cloth on a little hook on the inside of the door under the sink to finish drying.

Once the Bar Mop Towel is dry, I toss it in the handled bucket under the sink with the other dirty towels. Once I have a load of them, I wash them with our other kitchen towels.

The Best Tips on How to Organize Under the Kitchen Sink

This year one of my goals is to get our home more organized. I don’t have a thought out plan on how to make it happen. It’s more like this: I’m going to tackle a space when I decide I’ve had enough of the mess. So today that mess is the cabinet area under my kitchen sink. If you have avoided that cabinet like me, I can help. I’m sharing my whole step-by-step process on how to organize under the kitchen sink. Plus I’ll talk about the one item many of you store under your sink that won’t be under mine!

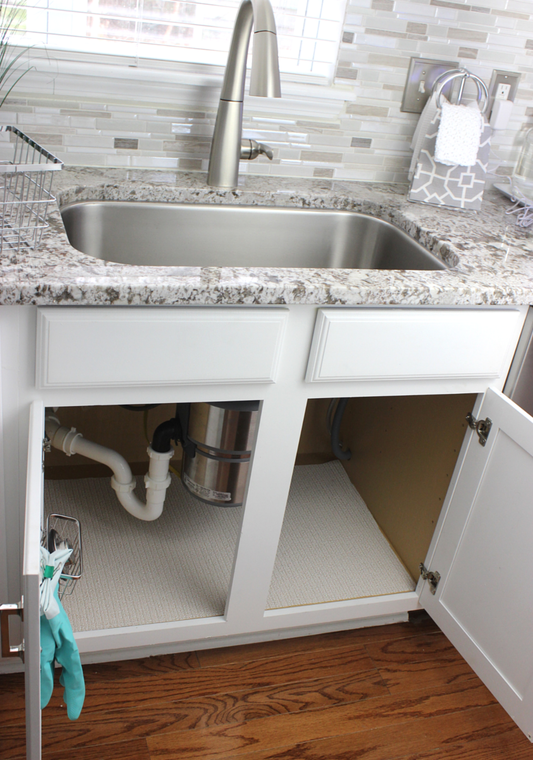
There is a reason why the cabinet under the sink has doors. Let’s state the obvious, there’s holes in the wall for plumbing with ugly plastic pipes. Who wants to look at that?! You’ll also find under the sink those big garage disposals and cords. Plus it’s just like the darkest place in the whole kitchen. I much prefer this view!

REMOVE EVERYTHING

Before I show you the good — aka the finished look — I have to show you the bad and ugly. Yes, my under sink cabinet had become a crazy mess. It’s so embarrassing to admit but I’m giving you full transparency here. We’re all friends right?

SORT AND PRIORITIZE

Once you have all the items out you can start to sort and prioritize what should be in this space.  If you find items that don’t belong, remove them and store elsewhere. Then think about what annoyed you most in the past with items under the sink. What needs to be closest to the front? What do you reach for daily?

One of my biggest frustration I was having in this space was not being able to easily reach the dishwasher cleaning pods. I would have to pull our like two items just to get to the container. Since we run the dishwasher daily, this was annoying.

things to consider before buying a sink

When designing a kitchen it’s easy to forget about the sink. You’re already choosing cabinets, countertops, tile, appliances and more. Here’s how to avoid the most common mistakes and make sure you get everything you want and the kitchen sink

Design

A great kitchen sink can either enhance or detract from the overall design of your kitchen.

Farmhouse Sink

Apron Front (or farmhouse) sinks like this fireclay sink by Elkay, can give you a more traditional style. Just remember if you choose and Apron Front sink that will need to be installed before the countertop fabricator can field measure

Quality

When it comes to quality there are a few guidelines that can help you pick the right sink for your kitchen, In the global economy we live in now, there are plenty of knock off brands, and low quality offerings out there. A quick amazon search will give you hundred of kitchen sinks for less than $300 each. Before you click the buy button make sure it’s made made by a reputable manufacturer. We love Elkay & Kohler. Both Elkay & Kohler have most of their manufacturing done in the U.S. and provide really good warrantees through their dealer networks. Many other brands that you’ll find online are manufactured oversees, may use sub-standard raw materials, and don’t all have the same quality control standards that we’ve come to rely on from Elkay & Kohler.

Warranty

Warranty Is just as important as quality when choosing a sink. Most sinks will have a stamp on the box that says there is some sort of warranty. It’s hard to decipher what this really means, so we recommend asking the dealer what kind of warranty they supply, What really happens where there is an issue with that sink? After your kitchen is completely finished, and you notice a chip or crack in the sink, how do you get it fixed? Many suppliers will offer to send a new sink, but you’ll have to cover the cost of install, plumbing, lifting the countertops, etc., that come with replacing a sink. Most often those costs amount to much more than the cost of the sink.

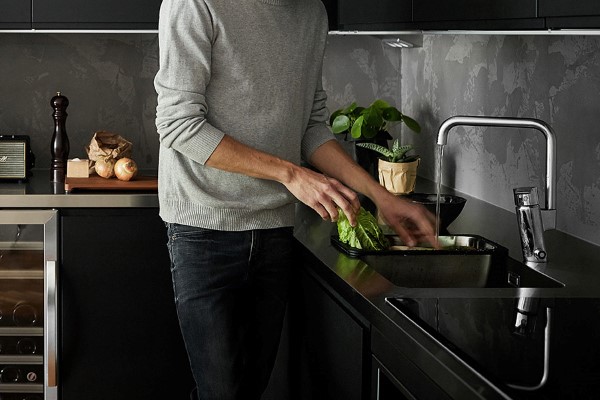
Kitchen Sink Buying Guide

Every kitchen revolves around the sink, whether it’s used for washing hands and rinsing food or cleaning a huge load of dishes. We’ll show you how to find the right one for your space, from format and material to installation.

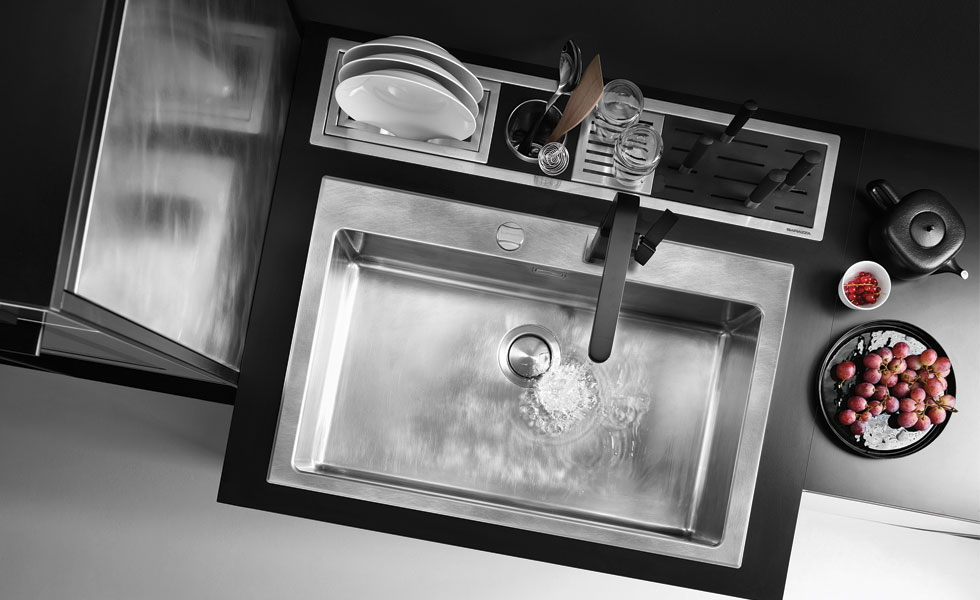
The Most Important Part of Your Kitchen

Few things in the home are as important or frequently used as the kitchen sink. It’s one of the most important decisions you can make, and we’ve got the right one waiting for you. Whether it’s a simple one-bowl configuration or three-bowl farmhouse sink, the perfect one is just a click away.

Choose the Sink Format

Bowl Configuration: One, two, or three — explore what works for you.

Depth: Choose bowl depth(s) based on your needs. Deeper bowls are more versatile and allow for easier cleaning of large pots. Shallow bowls are convenient for general tasks and more accessible for children. Multiple bowl sinks can vary in depth from one side to the other.

Shape: The rectangular shape is the most functional, but review other options for a different look.

Select the Material

Enameled Cast Iron: These are solid cast iron sink covered in porcelain enamel for long-lasting durability. They’re available in a variety of colours and resist staining, chipping, and scratching.

Composite Materials: Quartz or granite, combined with acrylic or polyester resins, form a rock-hard composite sink that resists staining, chipping, and scratching.

Acrylic: Made with acrylic materials and reinforced with composite backing, these sinks are available in a variety of colours and resist staining and impact.

Stainless Steel: Finishes and steel thickness affect the sink’s durability and ability to disguise scratching, but they’re very good at resisting burning or cracking. They come in a variety of decorative finishes, with some insulated to reduce noise.

Consider the Installation

Undermount: They attach below the countertop for a more integrated look and easier clean up, with faucet holes drilled into the countertop. They work best with stone or solid-surface countertops.

Drop-In: Self-rimming and easy to install, faucet holes are pre-drilled into the sink ledge, making them ideal for replacement projects.

Integral: They’re made of the same material as solid surface countertops for a seamless appearance and easy clean up. These sinks are moulded into the countertop with faucet holes drilled in.

Opting For A Corner Kitchen Sink

How do you choose the right sink?

The sink together with the tap is the most used area in the kitchen. That is why the choice should be made with thought to match your personal needs. Stala has a wide selection of sinks and worktops to offer alternatives for all tastes and purposes. But which things should be paid attention to when designig a kitchen?

Do you handle large plates and kitchen equipment and prefer to wash dishes by hand?

“If you often wash dishes by hand and handle large dishes and kitchen utensils, it is going to affect the size of the bowl and even the number of bowls you need. For others, a small sink will be sufficient, while others might need a maxi-sized sink to even fit whole baking trays”, Peltonen describes.

At the summer cottage or when dishwashing by hand it is convenient to have two bowls, while those who cook a lot can appreciate a one and a half bowl sink. If you like to bake or cook with meat and fish, a kitchen worktop with plenty of hygienic stainless steel working surface is a convenient and safe choice. A worktop can be chosen with a raised edge profile, which keeps water on the counter instead of flowing onto the floor.

What to consider while choosing a counter top material and sink?

When you have identified your kitchen needs and habits, it is sensible to also consider the other countertop material for the kitchen. With sinks, our materials stainless steel and quartz composite are both durable and long-lasting choices for a kitchen. Your own taste is best to be used with the choice of these two.

If you choose a laminate or wood countertop material, a sink with a tap area would be the best choice, since mounting the tap straight onto wood or laminate can create risk with moisture. It is also worthwhile to have at least some stainless steel drainage area or working surface next to the bowl, since wood is not the best material to withstand splatters of water and setting wet dishes on.

Kitchen Sinks: How to Choose the Best Style for Your Needs

However, with so many styles to choose from, are homeowners choosing style over function? How can you determine which type of kitchen sink is best for your needs? Freshome asked experts from Kohler, Moen, Delta and Franke Kitchen Systems for tips on understanding the function of various kitchen sink styles.

The aesthetic appeal of the kitchen sink

“With the evolving role of the kitchen leading to tasks beyond traditional cooking and cleaning, people are often selecting more secondary sinks,” explains Peggy Gallagher, Senior Product Manager at Delta. When choosing the right sink, Gallagher tells Freshome that there are several factors to consider, but she believes style is the main driver.

“The sink is the workhorse of the kitchen,” according to Chris Nealon, Product Manager of Disposals and Sinks at Moen. “From making morning coffee to scrubbing dishes at night, not to mention all of the hand washing, cup filling and cleaning that goes on in between, the faucet and sink area see a lot of traffic every day.” With so much going on, Nealon tells Freshome that it’s important to find a kitchen sink that fits homeowners’ needs while still providing an appealing aesthetic.

Kitchen sink styles

“Large, single-bowl designs are convenient for washing oversize cookware, while dual-bowl sinks allow for quick wash-ups and offer multi-tasking functionality for the home chef,” Nealon says.

“Regarding design, undermount sinks offer an appealing aesthetic, make cleanup a breeze and are the ideal complement to popular natural stone and solid surface countertops,” Nealon explains. “The exposed front wall of farmhouse sinks complements traditional kitchens well, whereas drop-in sinks offer added convenience with a quick and easy installation process,” he says.

Choosing a Kitchen Sink: Things You Need to Know

Do you know the hidden benefits (and pitfalls) of choosing a single bowl or a double bowl? Do you know your farmhouse from your under-mount (or the difference between the two)? Or which finish has the final say in quality? We got to the bottom of the bowl to give you everything you need to know on sinks.

The trifecta of style: There are three main bowl styles: farmhouse, top-mount, and under-mount.

Farmhouse bowls: While great for accommodating large dishware and minimizing splashing, these are heavier and may require a special base cabinet for installation.

Top-mount bowls: These are characterized by the “drop-in” rim that holds the sink in place on the countertop. The rim makes this type of sink easy to install, but also makes it easier for dirt to accumulate.

Under-mount sinks: They look more sleek and modern, but often take double the installation time compared with top-mount sinks.

How to Choose a Kitchen Sink

Few of us today find ourselves chained to our kitchen sinks, washing up the dishes (thanks to our dishwashers), and yet the sink still plays a vital role within the modern-day kitchen. Thinking about how you use a sink on a daily basis – and perhaps how sinks in previous homes have met or failed to meet your needs – is a good place to start when thinking about buying new. But the aesthetic a sink brings to the kitchen interior scheme is also a priority — the sink is after all a feature in its own right.

Size and bowl configuration are among the first considerations.

If a sink is used very sparingly for tasks such as washing up, a single bowl (or ‘1.0’) may suffice. Single bowls are a good option for utility and/or boot rooms, and for kitchens short on surface space.

Many homeowners opt for 1.5 bowls and even two, which provide greater flexibility when it comes to tasks such as tipping away excess drinks whilst washing up, or for peeling vegetables.

Fitting the sink

Do look at a product’s ‘minimum cabinet size’ whilst specifying too. “Most sinks will fit within a 600mm cabinet, but it’s always worth checking as some sinks may require a larger cabinet size, even as large as 1,000mm,” says Rangemaster’s Paul Scarborough. This is particularly key when retrofitting a new sink where the units and worktop will remain.

Tap holes

Bear in mind that some inset models may come complete with one or more pre-drilled holes to accommodate a tap — ideal if you don’t have clearance or wall space behind to mount a tap, but far from perfect when the circular hole won’t accommodate your new square tap

Undercoating

Look to see if your chosen model comes with an undercoating, which is applied to a sink’s underside. “A good undercoat provides great sound insulation and will therefore prevent your sink from making too much noise when washing bulky items such as pots and pans. It can also prevent condensation build-up on the base of the sink,” explains Luke Shipway of Caple.

How to Choose the Right Stainless-Steel Kitchen Sink

Stainless steel scores plenty of brownie points for being an exceptional material for kitchen sinks. There are many different sink styles and materials available today and stainless steel is by far the most popular and common. If stainless steel is your material of choice for your new kitchen sink, then there are a few things you will need to consider that will help to narrow down your choices in shape, size and style

What is stainless steel?

Stainless steel is an alloy (or mix) of steel, chromium and nickel. Two details to look out for when selecting a good quality stainless-steel sink are the grade and the gauge of the stainless steel. The higher the percentage of chromium and nickel elements, the better the grade of stainless steel.

Why choose stainless steel?

Stainless steel is the most common choice for kitchen sinks and with good reason. It’s a very durable material, which is easy to clean and requires very little upkeep.

Type: Top-mount sink

When you are choosing a stainless-steel sink for your new kitchen, the two most common installation options that you will be offered are under-mount and top-mount.

A top-mount sink, also referred to as an inset sink, is the more cost-effective option, both in terms of retail cost and the cost associated with installation. The outer rim of the sink sits on top of the bench, such as the one pictured here. These sinks usually have a stainless-steel drainer board attached, although you can choose to have one without.

Electronic Leak Detection Problems Addressed by Expert Plumbers

Protect your home with highly rated water leak detectors

How do water leak detectors work?

Water sensors detect and prevent excess moisture and flooding caused by broken pipes and faulty appliances. A leak detection system is made of sensors, shut-off valves and a centralized hub. The sensors are placed in areas where leaks are common, such as near faucets and beneath water heaters.

Home water leak detector systems trigger a water sensor alarm if they detect moisture in a location that should be dry. Some leak detectors also monitor for changes in acoustics. Since all leaks create soundwaves, the detector gauges the severity of the leak by the frequency of the sound it produces. For example, underground water leak detectors for finding slab leaks utilize acoustic technology.

Knowing that there is a leak is one thing, but being able to stop it from damaging your home and belongings is where the real power lies. Modern water detectors that combine moisture sensors and flow-based leak detection automatically shut off valves to prevent you from coming home to a big, watery mess. Automatic shut-off valves are installed near your water main and cut off the flow if the detector senses moisture or irregular pressure — this prevents the extensive damage that can be caused by water leaks that occur when you’re away from home and can’t access the water source.

Broken seals, clogged lines, loose connections, damaged joints, corrosion and excess water pressure are just a few of the most common causes of water leaks that sensors can detect. Water leak detectors also help prevent damage caused by tree roots and rapid or extreme temperature changes, which are difficult to discover on your own before it’s too late.

Wondering how to detect a water leak underground?

Look out for pools of water or damp patches on your floor with no visible signs there’s a leak in your ceiling.  Smells are a giveaway too – underground leaks tend to take longer to come through which leads to mould and mildew, both of which have a distinctive odour.

If you don’t want to have to keep looking for signs of a leak, consider using a leak detection tool.  There are several on the market, and all work slightly differently. With Leakbot, for example, you attach it near your stop tap, and it uses technology to monitor the temperature of the water going through your taps.

A leak detection tool triggers an alert if there’s a leak, which gets sent to you on a mobile app, giving you a chance to take a look and see if it’s something you can fix, or get in touch with a plumber. The time and money a leak detection tool could potentially save you makes them well worth the small, initial investment.

How Can a Plumber Find the Source of a Water Leak?

When you call a plumber to find the source of a hidden leak, they will begin by doing a walk through of your home to check for any signs or clues of a possible leak. This may include checking fixtures, under sinks, irrigation, and pool systems to rule out these sources. Your plumber will likely check the water meter as well to get an idea of how much water is being used.

The Best Water Leak Detection Tool

After ruling out surface and fixture leaks, your plumber will need to look for underground leaks or leaks hidden in the walls. The most effective tool to detect these types of water leaks is professional sound detection equipment. Using headphones and a microphone, a highly skilled technician will be able to listen for the sound of running water underground as it travels through the pipes. Additionally, they may also use pipe locator clamps on the visible portions of a pipe to transmit a radar signal over the pipes. This process is known as “charging the pipes.” Once the location of the leak is identified, an experienced plumber will explain the best method(s) to repair it and prevent any water damage to your home.

How to Check a Water Meter for Leaks

The best way to find out if you have a plumbing leak is by monitoring the water meter. Here’s how to go about it:

  • Turn Off All Water: Start by making sure there isn’t any water being used inside or outside your home including lawn or garden irrigation, toilets, clothes washers, dishwashers, faucets, icemakers, and automatic backflow cleaning in whole house water filters.
  • Check Flow Indicator: open the cover on the water meter at the street to see if it has a flow indicator. This is a small rotating wheel on the meter that can detect even small amounts of water flow. If the flow indicator is moving, you have a leak somewhere in your house or yard.

Tub and shower: Splash leaks

Splash leaks are simply water escaping past a shower curtain or a shower door. Plumbers tell us it’s the most common type of bathroom leak. Although it may sound minor, this leak causes major damage when water seeps into the subfloor where flooring meets the tub or shower. Before long the vinyl flooring or tiles begin to loosen. Even worse, the plywood subfloor delaminates and rots, requiring a huge, expensive tearout and replacement project.

Signs of trouble:

  • Curling vinyl flooring or loose tiles next to the tub.
  • Peeling paint or flaking, chalky-looking wood finish near the shower.
  • Water stains on the ceiling or joists below.
  • Mold spots on the wall or floor near the tub or shower.
  • If you use a curtain, look for standing water on the floor after you shower.

How to find the source of a bathtub drain leaking:

  • If you have a shower door, splash water all around the door and frame. Leaks around the frame may take five minutes or longer to show up.
  • If the door has rubber gaskets or a rubber door sweep, check them for gaps.
  • Also check for any gaps in the caulk where the shower or tub meets the flooring.

How to fix a leaking tub drain:

  • Be sure to overlap sliding doors correctly when you close them. The inner door should be closest to the faucet.
  • If you have a shower curtain rather than a door, make sure you close it completely when you shower, or add a splash guard.
  • Seal a leaking frame by running a small bead of tub and caulk around the inside of the frame. Force the caulk into any gaps between the frame and the shower surround. Quickly wipe away all the excess caulk. When the caulk dries, test for leaks again.
  • Replace any worn gaskets or door sweeps. Bring the old one to a home center or plumbing supply store and look for a matching replacement (be sure to get the correct size to fit).
  • If the old caulk along the floor shows gaps, scrape it out and run a new bead.

Underground Trenchless Pipe Replace With Minimal Digging

BENEFITS FOR CHOOSING TRENCHLESS SEWER LINING

Drain issues are not something you should ignore. While clearing the clog is only the first step, the second is to figure out where the root of the problem is. The best way to do so is with a camera inspection of your drain and sewer lines

When the primary cause is a damaged or deteriorating sewer pipe, or if tree roots are making their way into your host pipe, that’s where trenchless sewer lining comes into play.

In the most basic terms, trenchless sewer lining is the process of creating a new pipe inside the existing host pipe. A resin-saturated felt tube made of polyester is inserted or pulled into a damaged pipe. The lining hardens making the inside of the pipe ‘as good as new’. Little to no digging is involved in this trenchless drain lining process, making for a more environmentally friendly method than traditional “dig and replace” sewer. Trenchless sewer and drain rehabilitation methods are generally more cost-effective than traditional exhume (dig) and replace methods. Many people are now looking to trenchless pipelining as an alternative to traditional sewer and drain repair.

Less Damage to Your Landscaping

We’ve all seen big trenches dug through a neighbor’s yard from the house to the city main out near the street. Thanks to the minimal need to dig, your landscaping won’t need a total to revamp. First, we clean out the host pipeline with our rooter machine. Next, a special pipe camera is used to confirm whether the pipe can receive lining or not. If it can, all it will take is just one small pothole (4ft. x 3ft.) to expose the pipe, followed by the lining being inserted and “cured-in-place”. Of course, the alternative would be to dig and replace large (or complete) parts of the pipe, leaving you with a ripped up yard.

It’s Faster and More Cost-Effective to Fix Rather Than “The Dig and Replace” Method

With expert knowledge and careful process, sewer lining can be done within a few hours, leaving you with pipes in almost brand new condition. Another major plus is that by identifying the area that needs fixing, you don’t have to worry about an expensive, massive pipe replacement. Certainly, we can fix the area in question, line the pipe and bring it to where it needs to be, without the extra waste of product and time (which saves you money in the process).

TYPES OF TRENCHLESS SEWER REPAIR METHODS: WHICH ONE IS IDEAL?

The repair of sewer lines is time-consuming, costly, and disruptive to day-to-day activities. Traditional sewer repairs involve trenching. As such, you have to dig deep trenches in the street next to your home, driveway, pavements, car parks, or your back or front yard. Instead of rerouting traffic and paying lots of money to dig up such areas, you can opt to use trenchless sewer repair methods to avoid disruptions.

THE PIPE BURSTING METHOD

The pipe bursting trenchless sewer repair method involves inserting and pulling high-density polyethylene pipe (HDPE) through an old damaged pipe. The inserted pipe bursts open or fractures the damaged pipe without removing it. You have to dig holes on both ends of the lateral pipe before inserting the HDPE pipe. You have to connect a ‘bullet’ or ‘bursting’ head to the HDPE pipe and pull it through the old pipe

SLIP LINING, PIPELINING, OR CURED IN PLACE PIPE (CIPP) METHOD

The slip lining sewer repair technique allows the installation of an epoxy liner into a damaged lateral sewer line. The repair creates a pipe within another pipe. The sewer lining or ‘cured-in-place pipe’ is tube coated with flexible resin. This lining gets pulled through the broken sewer line and inflated to harden and create a new pipe lining within the old damaged pipe.

IS THE CHOSEN METHOD FRIENDLY TO THE ENVIRONMENT?

Pipe bursting is a sewer repair method that is more friendly to the environment than CIPP. If not used well, the slip sewer lining method can release pollutants into the ground and utility lines. Research shows that some CIPP repair works have led to the release of styrene into storm-water. Styrene is a hazardous pollutant. Pipe bursting is thus safer than CIPP because it doesn’t involve the use of any chemicals with contaminants.

WHICH TRENCHLESS SEWER REPAIR METHOD IS MORE DURABLE?

Pro plumbers hold that both the sewer pipe lining and pipe bursting methods are long-lasting. CIPP sections last for at least five decades, and this can give you peace of mind. But the slip lining method may not last as long as the pipe bursting method because of the reduction of the diameter of the original sewer piping. But the pipe bursting method establishes a whole new pipe that can last longer than the ‘pipe within a pipe’ under the CIPP method.

HOW TO CHOOSE THE RIGHT SEWER REPLACEMENT COMPANY

When it comes time to replace your sewer system, you want to make sure you choose the right sewer replacement company for the job. Whether you own a home or business, replacing your sewer lines is a large investment and you want to make sure you are getting a quality sewer system that will last you for decades to come. Before hiring just on price, take the time to find a company that has experience, stands behind their work and offers the most reliable sewer replacement technology that will save you money not only now, but in the long run.

Check the Sewer Replacement Company’s Credentials

The first step in choosing a sewer replacement company is to find a company that is properly licensed and insured who also has extensive experience and an excellent reputation. Check with the local city, county and state licensing agencies to make sure the company you are considering hiring has the proper licenses for a sewer contractor

Are they a Registered Side Sewer Contractor? In Seattle, to work on side sewer that are in the public right-of-way, you must be a Registered Side Sewer Contractor or RSSC. If a company is a RSSC, they have successfully completed an exam on public side sewer repair and have the proper city and state contractors licenses.

Are they accredited with the Better Business Bureau? Many complaints of poor work or service by businesses are filed with the Better Business Bureau (BBB). Make sure the company you are hiring is accredited with the BBB and in good standing

Do they stand behind they work? Ask any company you are considering hiring for a sewer replacement what type of guarantee they offer on their work. They should stand behind the quality of their work and offer some kind of guarantee.

PIPE BURSTING: WHEN TO CHOOSE TRENCHLESS SEWER REPLACEMENT

With older technology, repairing a broken or punctured sewer line meant a week of excavation, laying new pipe and repairing the damage left by the dig. New trenchless sewer replacement technology, known as pipe bursting, makes it possible to place new higher-quality pipes without the messy excavation.

Minimize digging – With only two small access holes required, trenchless sewer replacement saves you from a week or more of dealing with equipment and mess on your property. This reduced disruption is especially helpful for replacing pipes under paved or landscaped surfaces, under bodies of water, in Delaware’s environmentally sensitive areas such as near estuaries and in contaminated soil.

Reduce costs – Replacing pipes with the pipe bursting method typically costs around 40 percent less than conventional excavation and pipe-laying methods. You’ll also avoid the expense of having to clean up the dig site and repair damaged landscaping.

Improve pipe life span – Older sewer lines are made of cast iron, concrete, clay or PVC pipes, all of which are prone to breakage and punctures. With trenchless sewer replacement, the pipe used is seamless HDPE, or high density polyethylene. It’s stronger than traditional pipe material and can function problem-free for up to 50 years.

Best in areas with few underground utilities lines – As the bursting head passes through the old pipe, it uses physical force to break the pipe apart. Utility pipes or wires very near the sewer line may be damaged by pieces of old sewer pipe. That means this technology is only appropriate in areas that are relatively clear of utility lines.

Is Trenchless Pipe Repair Always the Best Solution?

Yes, going trenchless is the best choice

Normally, offering such a blanket answer might seem foolish. But we’ve been in the business for a long time and know the benefits of choosing trenchless technology for pipe repair. The alternative to trenchless is the old-fashioned method of digging up the ground to reach the buried sewer or water line to fix or replace it. Trenchless offers so many advantages compared to the old techniques that there’s little question which one is the best

For example:

Trenchless pipe repair takes less time. Using excavation methods can require a day, or sometimes ­days, to complete. Trenchless repairs can usually be completed in a few hours when you hire the right people.

Trenchless pipe repair is more cost-effective. It’s faster and less labor-intensive, with much smaller crews required to do the work.

Trenchless pipe repair is far less disruptive to a home, business, or facility. There’s no need to tear up a whole parking lot, lawn, or another part of the property just to access the broken pipe. Many trenchless jobs can be done without any digging at all. Those that do require digging only need one or two small pits excavated.

Trenchless doesn’t mean only one technique

There ­are choices involved when it comes to trenchless repair services. Most of them you can leave up to the professionals handling the job. Before starting the repairs, the trenchless experts will inspect the pipe to find out the extent and type of damage so they’ll know the best way to fix it. These inspections are also part of trenchless technology: push-cams inserted into the pipeline which send back images to monitors where technicians can observe the pipe interior. Using these push-cams eliminates an enormous amount of guesswork and saves time—the technicians know exactly what type of work they need to do, where to do it, and how to do it.

Once the inspections are complete, the technicians will decide on whether the best way to fix the pipe is pipelining or pipe bursting. Pipelining fixes a leaking or decaying pipe from the inside by sliding a liner into the pipe and setting it in place. Pipe bursting involves slipping a new pipe into the old one, then expanding it to shatter the old pipe and replace it.